What is Continuous Integration?
Continuous Integration is a practice where integration happens on frequent basis, and each integration will trigger automated build along with verification of code with automated unit tests.
Why should we use it?
Few of issues you may face during frequent integrations are:
1. Uncompilable code – Occurred largely whenever somebody changed Public API of code and checked in. Depended code elsewhere got broken due to these changes.
2. Bugs – Due to change in internal logic of one module, without checking impact elsewhere, might cause bugs.
By introducing Continuous Integration into development process you will be auto building for each integration, build report can be mailed to all team members. If somebody checked in some code which made solution uncompilable, with this process in place, you will be able to detect as soon as it is failed and can act upon it.
Once build happens, unit tests can be configured to run tests to verify code correctness. By doing this bugs can be detected early, which will help in reducing effort required to fix that bug. The sooner the easier it will be to fix the bug.
NOTE: Using check-in policy, check-ins of uncompilable code can be avoided.
Implementing using TFS 2008 and VS 2010 RC
We will discuss how to implement in a situation where VS 2010 RC is used for development, and TFS 2008 server is still being used.
Till TFS 2005, there is no easy way to implement continuous integration. But from TFS 2008, Microsoft started support Continuous Integration which made it easier to implement.
Simple Architecture of TFS 2008
I wont discuss TFS 2008 installation here.
Steps to implement continuous Integration using TFS 2008:
Build Server Setup
1. Designate a machine as build server. Ensure VS 2008 is installed in this machine to be able to successfully build. Install TFS Build service on this system. (Setup of TFS build service can be found in your TFS server CD under BUILD directory in root).
2. During installation of TFS Build Service, you need to provide credentials using which TFS Build service has to run. Ensure this user is also part of particular projects Build Service group in TFS server.
3. In Visual Studio Open Team Explorer. Right Click on Builds and select Manage Builds to add Build agent to use build server.
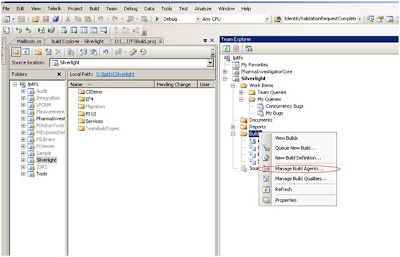
4. In Manage Build Agents dialog box, click on New button to add build server.
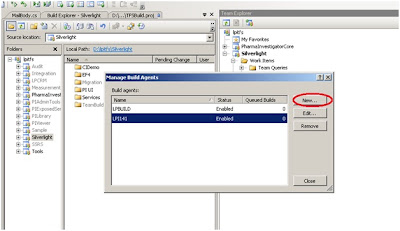
5. In Build Agent properties window, enter build server details
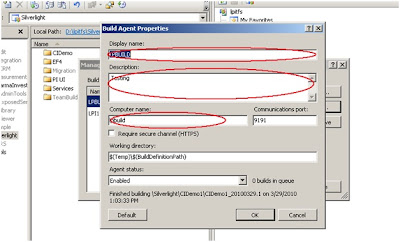
6. By clicking on OK, you had successfully added build server to TFS service. Now you can define builds to run on this build server.
Once you had added Build Agent, you can define builds and run on that build server.
Create Build Defintion
1. Open Team Explorer window, Right click on Builds and select New Build Definition…
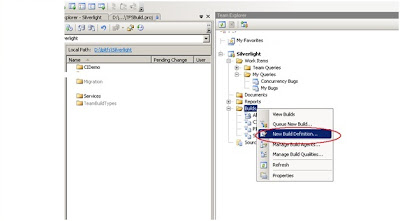
2. In Build Definition window,
a. In General Tab enter
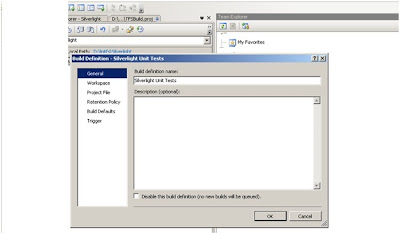
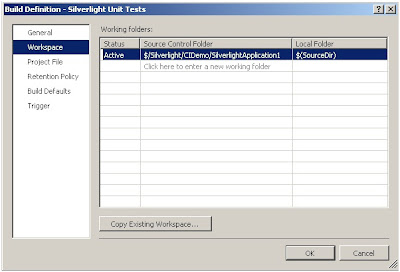
b. In Workspace tab, select Source Control Folder from which build files needs to be retrieved and Local Folder, specifies local folder on build server to which these build files will be downloaded for building.
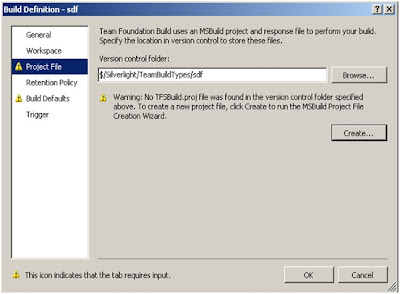
c. In Project File, under selected source control folder if TFSBuild.Proj is not created, as is case of New Build Definition, click on Create… to create TFSBuild.Proj.
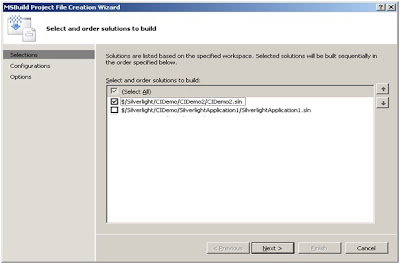
d. In MS Build Project File creation Wizard select solution for which you want to build.
e. Select configuration for Build
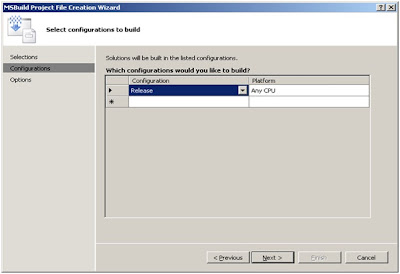
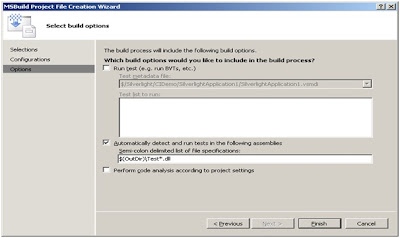
f. In Options, select unit tests and code analysis criteria and click on Finish to finish build file creation.
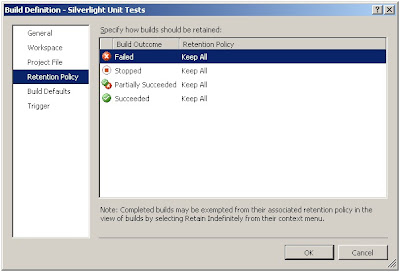
g. Select Retention Policy, which lays criteria for build management.
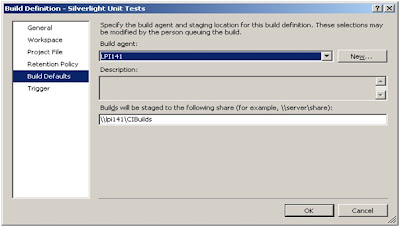
h. In Build Defaults, specify Build Agent using which you need to execute this Build, and also specify a UNC path of Drop location, to which all build files will be deployed.
i. In Trigger, for Continuous Integration select Build each check-in option. So, for each check-in, build will happen and unit test and code analysis if specified will also be performed.
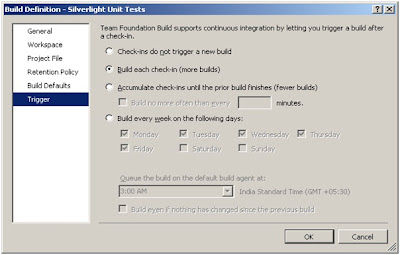
j. By Clicking on OK, you had successfully created a Build Definition. Now each check in will trigger a Build.
3. By double clicking on Build Definition in Team Explorer, Build Explorer window will be displayed where you can monitor builds, and see build reports.
With TFS 2008 and VSTS2010RC
If you are using VSTS 2008 and TFS 2008, you had successfully completed. But if you are using VS 2010RC, you are not yet completed. BuildAgent of TFS 2008 uses MSBuild 3.5 engine to compile your solutions. This build engine will not be able to compile VS 2010 solutions. In order to compile VS 2010 solutions as well, on Build Server performing below steps:
1. Install VS 2010RC on Build Server to make sure .Net 4.0 & SDK’s and MSBuild 4.0 are installed.
2. Configure Team Build 2008 to use MSBuild 4.0 instead of MSBuild 3.5. To do this edit %Program Files%\Microsoft Visual Studio\9.0\Common7\IDE\PrivateAssemblies\TFSBuildService.exe.config and set MSBuildPath property to C:\Windows\Microsoft.Net\Framework\v4.0.30128\
3. Restart the Team Foundation Build Service.
Send Mail with Build Report
Till now, you had created Build Agent, created Build Definition, and specified check-in as trigger point for continuous Integration process. Now, we want to take step further a bit, and need to send mail with build status along with build report.
For this there are two options available.
1. All Team members should subscribe for Build Completed events using Project Alerts window.
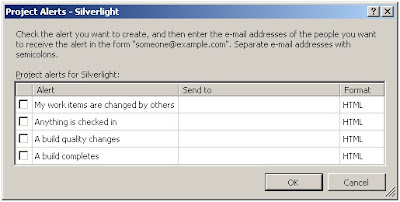
Using alert “A build completes” you can specify multiple email id’s in Send to for whom you want to alert. This needs to be done for all users.
2. Using Custom Tasks.
You can develop custom tasks which can be executed during Build Process. A custom task can be defined in a class library by deriving from Task abstract class, or by implementing ITask interface.
MSBuild Extensions pack already implemented some custom tasks, of which send mail is one task.
Conclusion
Though Continuous integration doesn’t prevent check-ins of uncompilable code or buggy code, it will enable to identify them quickly and act upon.
1 comment:
Nice article.
Post a Comment